Discovery
Opportunity and solution descriptions support Markdown on their full detail views and panels. Use paragraphs, headings, lists, links, emphasis, code, or tables to make longer discovery context easier to scan.
The Discovery section is the heart of Compass. It's where you manage your Opportunity Solution Tree — mapping customer problems to potential solutions and tracking their progress through your discovery funnel.
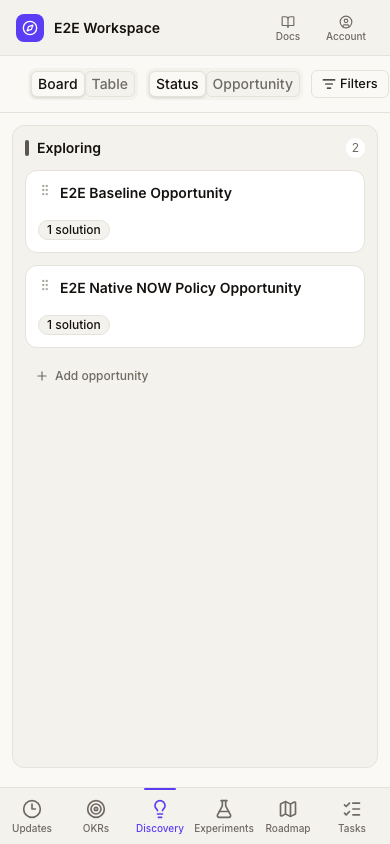
On mobile, each column fills the available board width with small side gutters. Swipe sideways to reach the next column.
📸 Screenshot: run
pnpm docs:screenshotswith aDOCS_SESSION_FILEto capture this image.
Use the Board | Table toggle in the page header to choose how you scan active opportunities. Board view supports drag-and-drop workflow management. Table view provides a compact overview of status, squad, customer segment, evidence, and solution count.
In Table view, select the chevron next to an opportunity to reveal its child solutions. Each solution row shows its lifecycle status, evidence count, and assumption count. Select an opportunity or solution title to open its detail panel.
The Opportunity Board
On touch screens, swipe over card content to scroll vertically or move horizontally between board columns. Use the dotted drag handle to move a card instead. On desktop, column headers stay visible while their cards scroll.
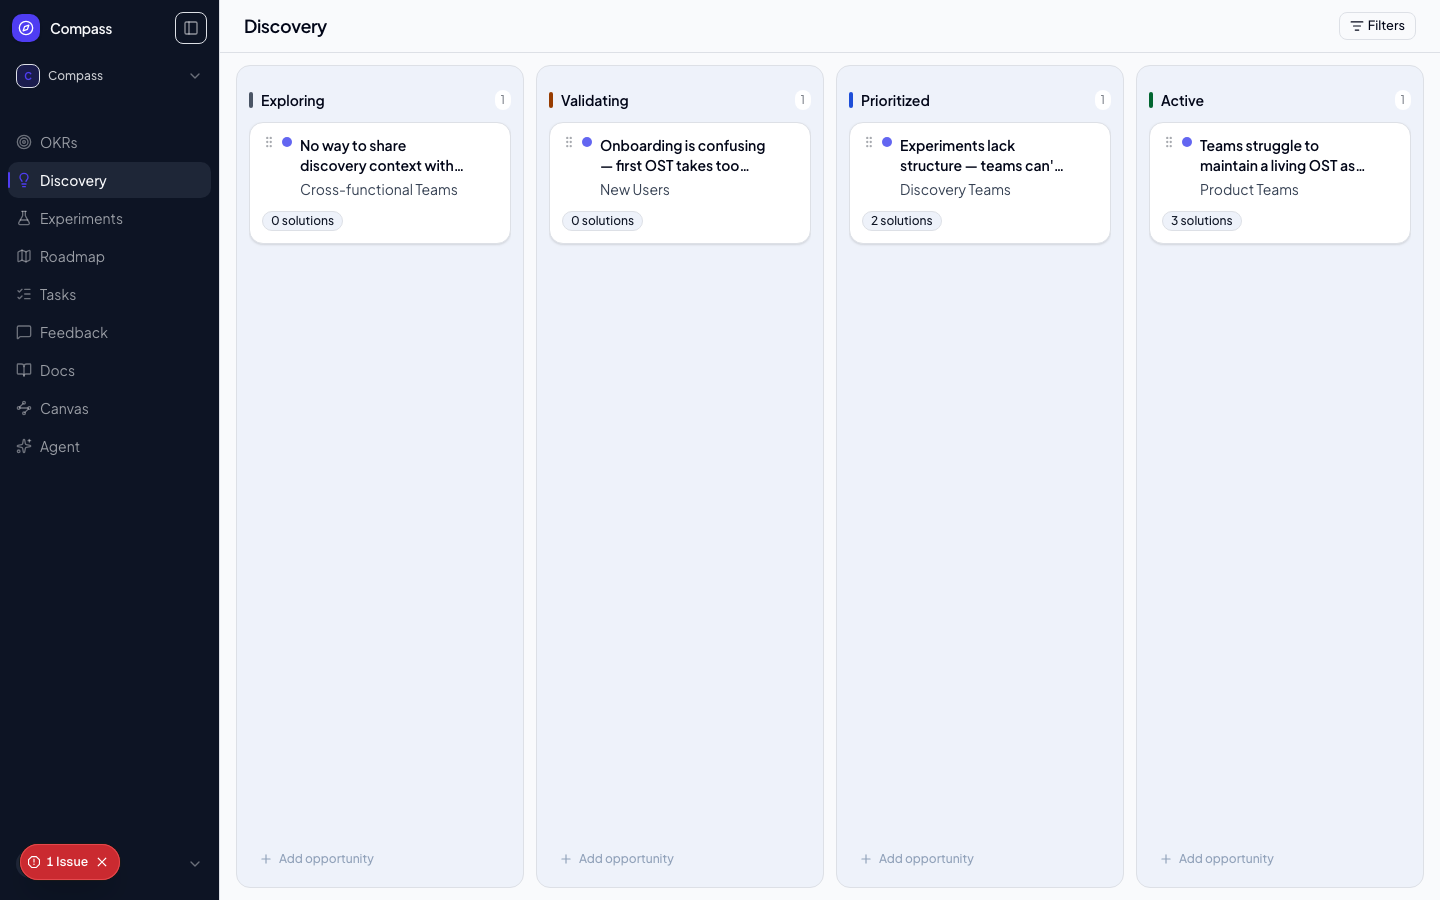
Opportunities move through four columns on the kanban board:
- EXPLORING — Newly created opportunities that are being investigated. You've heard this problem from customers but haven't yet assessed its importance or frequency.
- VALIDATING — Opportunities that look promising and are being actively validated. You're gathering more customer evidence, running interviews, or analysing usage data.
- PRIORITIZED — Opportunities that have been validated and selected for investment. Your team is working on solutions.
- ACTIVE — The opportunity your team is actively building toward right now. Typically only one or two opportunities are ACTIVE at a time.
Drag cards between columns to update status. Use Filters at the top of the page to filter opportunities by squad, or switch between Board and Tree views using the view control.
Exporting opportunities to CSV
Open the ⋯ (Discovery tools) menu and choose Export CSV to download the opportunities on the page as a spreadsheet-ready file. The export respects the squad and tag filters currently applied, so the file matches what you are looking at; view, group-by and sort are presentation only and do not change it. Columns: Title, Status, Squad, Customer segment, Score, Solutions, Evidence, and a Link back to the opportunity. Rows are ordered by status (Exploring, Validating, Prioritized, Active, then Archived), keeping the manual order within each status. Archived opportunities are included, so filter the Status column in your spreadsheet to hide them. Score is blank when an opportunity has no score or the workspace has no active scoring model.
Group by: Status or a custom field
In Board view, use the Group by picker next to Filters to switch how cards are grouped:
- Status (default) — the Opportunity board described above, columns are Opportunity statuses.
- A custom field — every Opportunity single-select custom field with at least one option is listed after the built-in groupings (for example a MoSCoW field with Must, Should, Could, and Won't). See Card sorting by a custom field below.
Solutions are not grouped here any more — they have their own backlog, described in The Solutions backlog. An old link with groupBy=opportunity opens that page instead.
A Solution belongs to the Opportunity it was created on for good: there is no action, in the board, the detail panel or the MCP API, that moves it to a different Opportunity. To aim an existing idea at another Opportunity, add a new Solution there. (A Solution can additionally be linked to Key Results; see Linking an opportunity to Objectives, and the workspace tree.)
Card sorting by a custom field
Grouping by a custom field turns the board into a card-sort exercise. To set one up, create an Opportunity custom field of type Select in Settings → Custom Fields and give it options (its own, or a shared option set). Multi-select fields aren't offered, because a card can only sit in one column.
- The first column is Unspecified. It holds opportunities with no value for the field, plus any whose value no longer matches one of the field's options.
- The remaining columns are the field's options in the order they're defined, with each option's color and a card count.
- Drag a card to another column to set the field to that option. Drag it back to Unspecified to clear the value. You can also use a card's ⋯ menu (Move to … or Clear …), which works from the keyboard too.
- Sorting only changes the field value. It never changes an opportunity's status, its order on the Status board, or whether it's archived. Cards can't be reordered within a column, and there's no + Add Opportunity button in this mode.
- If a change can't be saved, the card goes back to its previous column and an error message explains what happened.
The grouping is saved in the page URL as groupBy=field:<field id>, so you can bookmark or share a card-sort board. If the field is later deleted, changed to another type, or left with no options, the link opens the Status board instead.
Discovery Rail
The Discovery Rail is a collapsible left-side panel that lists every opportunity in the workspace, independent of which view (board or tree) or which opportunity you're currently looking at. Use the search box at the top to filter opportunities by title; results are grouped by status (Exploring, Validating, Prioritized, Active), with Archived opportunities tucked into a collapsible section at the bottom.
On desktop, the rail runs as a full sidebar alongside the Discovery page — click the collapse icon to shrink it to a slim icon strip when you need more room, and expand it again from the same spot. Your collapse preference is remembered locally so it stays put across sessions. The rail also appears as a slide-out panel when navigating to Discovery from other sections of the app, giving you the same opportunity list without leaving the page you're on.
Creating Opportunities
Click + Add opportunity at the bottom of any board column, or New Opportunity at the bottom of the Discovery Rail. Either one opens the opportunity composer. An opportunity has:
- Title — A short customer-centric problem statement (e.g. "Users don't know when their trial is expiring")
- Description — Context from customer interviews, support tickets, or usage data
- Squad — Optional team assignment
- Key Result link — The outcome the opportunity is expected to move
Write opportunity titles from the customer's perspective, not from a solution or feature angle. "Users can't find their billing history" is better than "Add billing history page."
The opportunity composer
The composer opens in the right-hand panel. On wide screens it docks beside the board, so you can keep scanning and searching the board while you write. On narrow screens it opens as a full-width sheet.
- Title is large and focused when the composer opens. A character counter appears as you get close to the 255-character limit.
- Status starts as the status of the column you opened it from. From the rail it starts as Exploring. You can change it before you submit.
- Squad and Customer segment are optional.
- Description supports Markdown, with the same rich editor and Markdown source mode used elsewhere. Insert opportunity outline adds Who's affected, Current pain, Evidence and Desired outcome headings.
- Objectives (Outcomes under Torres) is optional and appears only on Opportunity-first and Torres workspaces, above the Driving key result. Open the box, search, and tick every Objective this opportunity is being pursued for, up to 25. Each chosen Objective shows its cycle beside it when it has one; an Objective with no cycle is listed like any other. The links are created in the same save as the opportunity. Classic workspaces do not see this box.
- Driving key result is optional. Search the workspace's Key Results and choose the one this opportunity should move.
- Seed from feedback is optional. Search the workspace's feedback and select every item that points to this opportunity. Selected items appear as a list, and you can remove any of them. Linking works the same way as it does from the feedback board: the item's status doesn't change, and an item that is already linked to another opportunity moves to this one. The composer tells you when that will happen.
Press ⌘/Ctrl + Enter or select Submit to create the opportunity. The opportunity, its Objective links, its Key Result link and its feedback links are saved together. If any part is invalid, for example a Key Result from another workspace, nothing is created and the error appears in the composer. When it succeeds, the new card appears on the board and the composer turns into the new opportunity's panel. Browser Back doesn't return to an empty composer.
Your draft is saved on this device for each workspace as you type. If you close the panel (with Esc or the close button), reload, or leave the page, the draft is kept and the composer says Restored your unsent draft the next time you open it. Cancel asks before discarding a draft.
One opportunity view, at every size
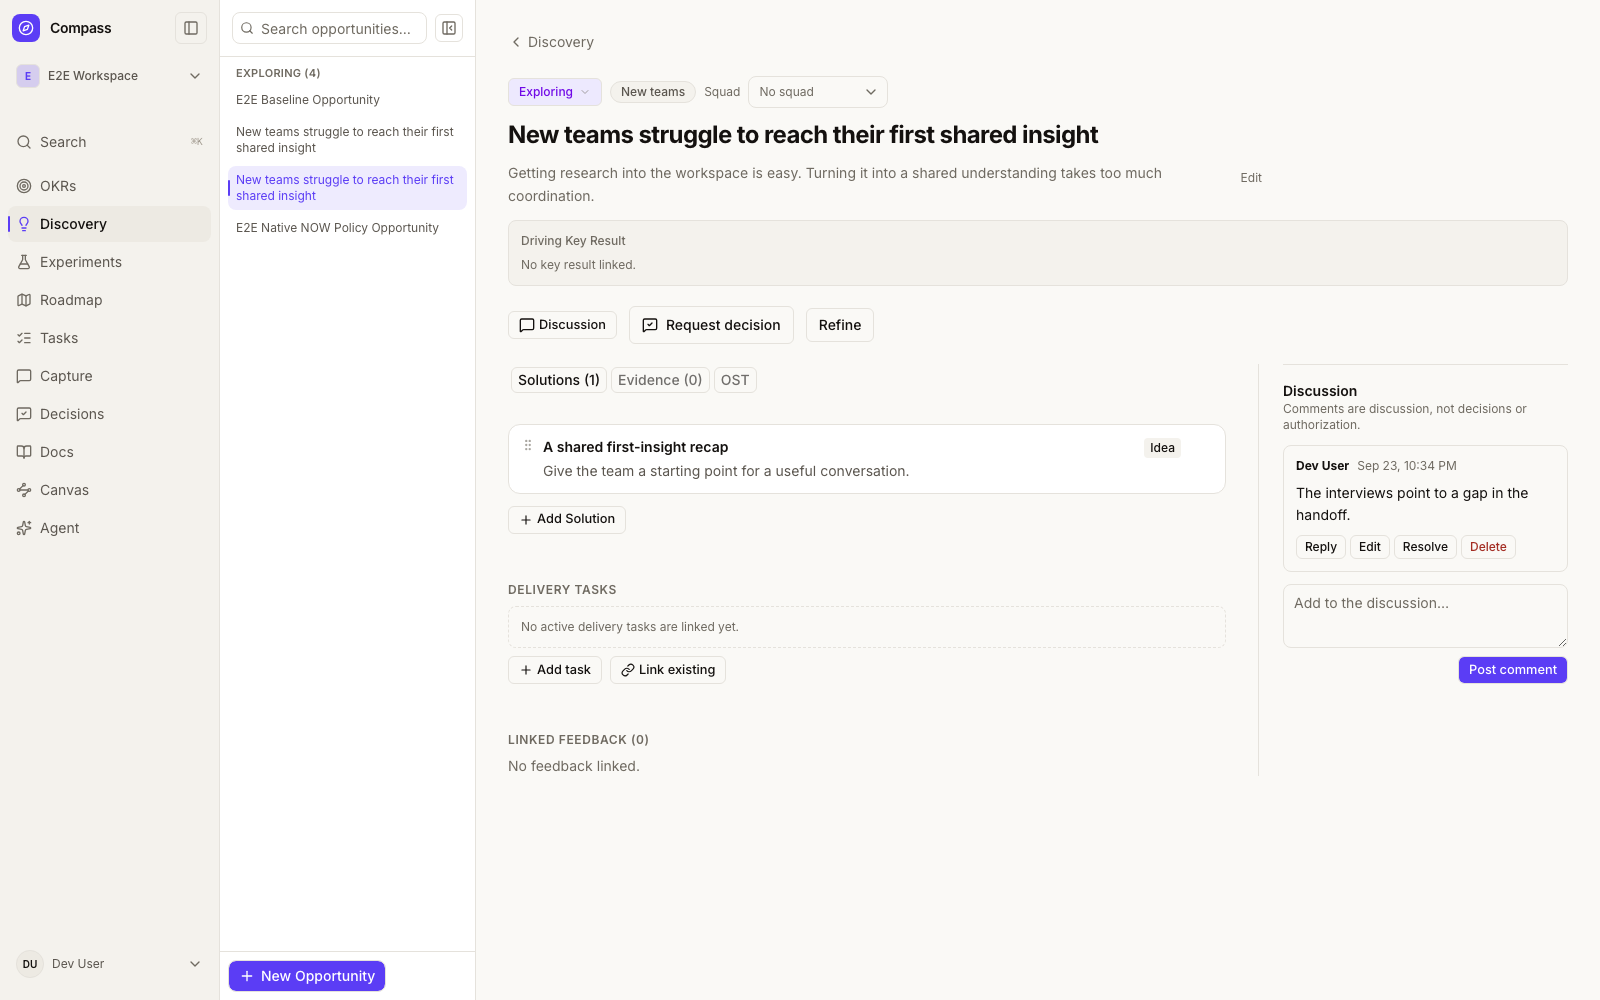
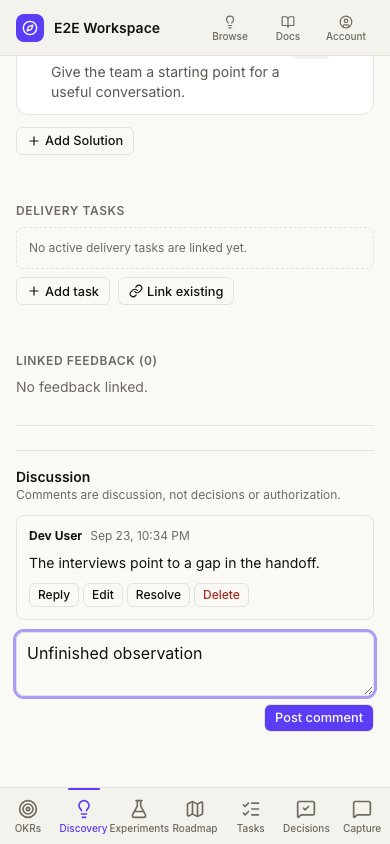
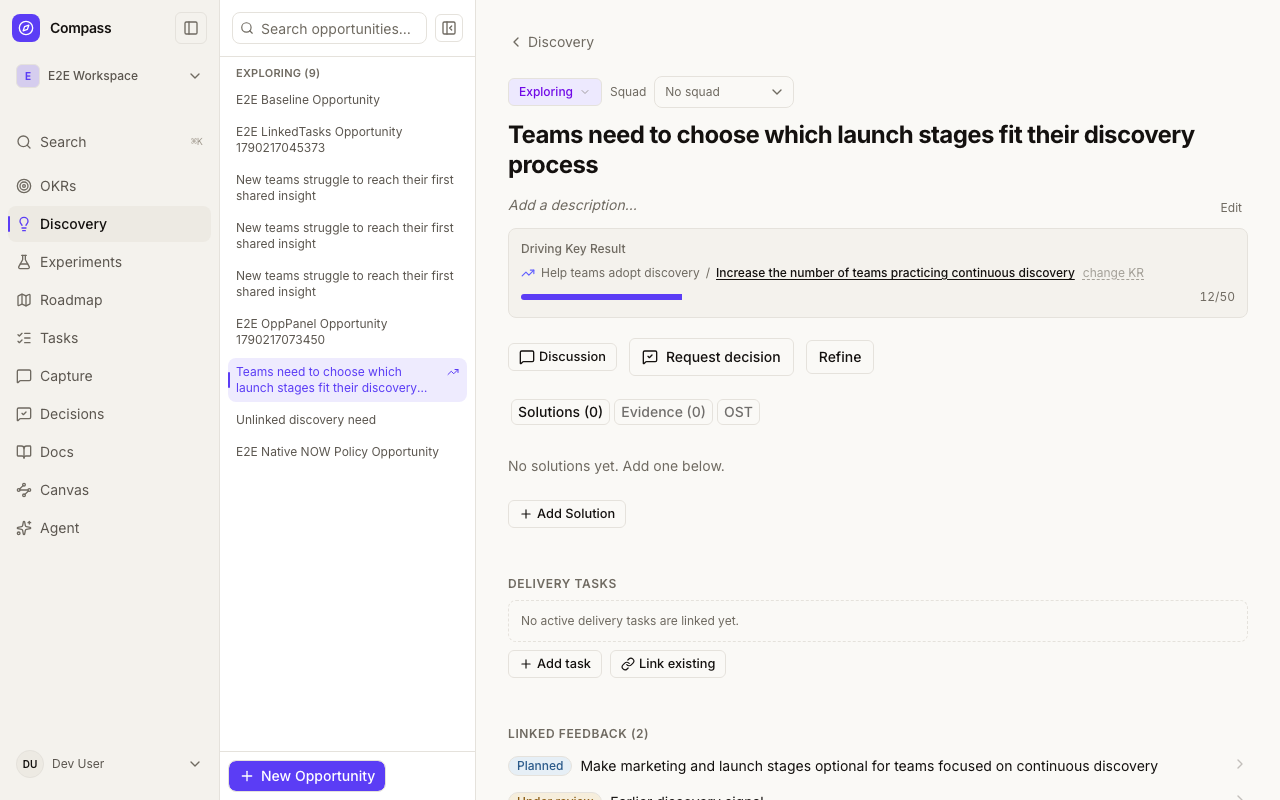
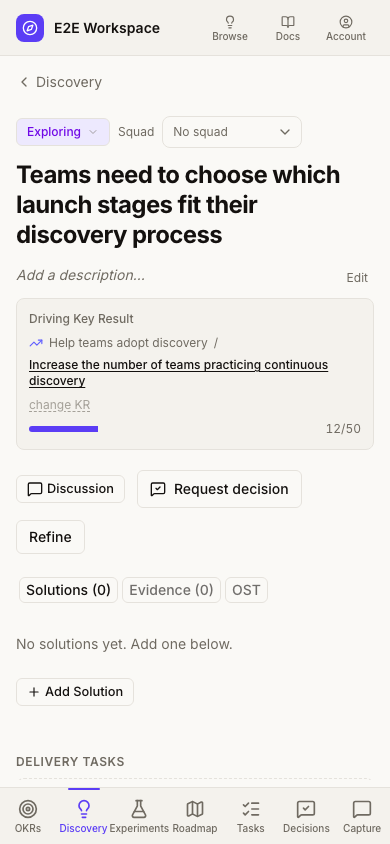
The opportunity panel and full page share the same detail view. Select Open full page to give it more room: on wide surfaces, Discussion sits beside the main content. In a narrow panel or on a phone, it follows the content in a single column. Use Discussion in the header to jump to the conversation.
Both surfaces support inline title and description editing, status, squad and Key Result changes, and the same Solutions, Evidence, and OST Tree tabs. Scoring appears when the workspace has an active scoring model; Details appears when opportunity custom fields are configured. Linked feedback, delivery tasks, interview history and decision actions remain attached to the opportunity.
Comments are shared across the panel and full page. Add or reply to a comment, edit your own text, and resolve or reopen a thread using the existing Discussion controls. Switching content tabs or resizing the view keeps your unfinished comment in place. Navigating away is not a draft-saving action.
Linked feedback and Key Results
Both the opportunity page and its detail panel show Linked feedback, with a count and each item's status. Select a feedback title to open its detail panel and read the original signal. The list is newest first; opportunities without linked feedback show No feedback linked.
Select the driving Key Result title to open its detail panel. change KR remains a separate control for changing the relationship in either surface. Panel navigation preserves your underlying page, and browser Back returns to the previous item.
Linked Feedback and Evidence are separate records. Linking a feedback item does not create an Evidence record, so their counts can differ.
The Solutions backlog
Discovery is the Opportunity backlog. To see every Solution against each other, open Solutions in the sidebar (next to Opportunities). It is a flat board of all the Solutions in the workspace, with one column per status: Idea, Validated, In delivery, Shipped, Killed.
- Each card shows the Solution title, its parent Opportunity (click it to open that Opportunity), a score badge when the workspace has an active Solution scoring model, and its assumption and evidence counts. Click the title to open the Solution panel.
- Drag a card to another column to change its status. Order within a column is not draggable here, because a column mixes Solutions from many Opportunities; use Sort by score (shown when a Solution scoring model is active) to rank them instead.
- Filters narrow the board by squad (the parent Opportunity’s squad) and by Solution custom fields. They apply to the table view too.
- New Solution (top right) opens a dialog: choose the parent Opportunity (required; any non-archived Opportunity in the workspace), enter a title and an optional description, and the Solution lands in the Idea column. It is the same action as + Add Solution in an Opportunity’s panel. Moving a Solution to a different Opportunity is done from its panel, never by dragging.
Board and table views
The Board / Table toggle switches between the status board and a flat table (?view=table). The table has one row per Solution: title (opens the Solution panel), parent Opportunity (a link), squad, status, score (only with an active Solution scoring model), evidence, and assumptions. Rows run from Idea to Killed in board order; Sort by score ranks them by score instead. The table respects the same filters as the board.
Group by
On the board, Group by changes what the columns are (?groupBy=):
- Status (default): one column per status. This is the only grouping where you can drag cards, and dragging changes the status.
- Squad: one column per squad, plus No squad. A Solution’s squad is its parent Opportunity’s squad.
- Opportunity: one column per parent Opportunity that has at least one Solution matching the filters.
- A Solution custom field: any single-select Solution field with options gets an entry in the menu. Columns are Unspecified (no value, or a value that no longer matches an option) followed by the field’s options in order.
Squad, Opportunity and custom-field groupings are read-only: cards cannot be dragged between those columns (a Solution’s squad and parent belong to its Opportunity, and Solution field values are edited in the Solution panel). Use a card’s ⋯ menu to change status, or switch back to Status to drag. An unknown or stale groupBy value (for example a deleted field) opens the Status board.
Columns keep a minimum width and the board scrolls sideways when the screen is narrower.
Solutions
Open an opportunity by clicking its card, then click + Add Solution in the detail panel. A solution is a concrete idea for addressing the opportunity. Each opportunity can have multiple competing solutions — this is intentional. The OST methodology encourages exploring multiple solution directions before committing.
Solutions have a title, description, squad assignment, and a list of assumptions.
Plan & Discussion
Expand any solution card and scroll to Plan & Discussion to track how a solution is actually going to be built, and to leave a running commentary alongside it. There are two entry types:
- Plan — a proposed implementation/engineering plan. Posting a new plan supersedes the previous one, which is pinned at the top of the section as the Current Plan so anyone opening the card immediately sees the latest thinking.
- Comment — a reply in the thread: a question, observation, or status update. Comments don't supersede anything and just accumulate in order; they are discussion, not a Compass Decision.
Click + Add Comment, write the body, and choose Comment or Plan update from the type selector before posting. Both humans (via the UI) and agents (via the add_solution_plan / add_solution_comment MCP tools — see MCP API) can post to the same thread, so an agent's proposed plan and a teammate's feedback on it show up side by side.
Approving or rejecting a plan
The pinned Current Plan carries a legacy status — Pending, Approved, or Rejected — shown as a badge next to it. The existing Approve / Reject buttons and approve_solution_plan / reject_solution_plan MCP tools change this reversible planStatus marker. It is not a tracked Compass Decision, does not authorize delivery or release, and does not change the Solution's status or trigger anything else automatically.
Phase 3 will route reviews of new Solution Plans through tracked Decisions. Until that capability ships, treat legacy plan status as non-authoritative review context rather than a Decision or authorization.
Once the Current Plan is approved, Send to agent appears alongside these buttons and opens the in-app agent on that plan — see Send to agent.
Assumptions
Assumptions are the riskiest beliefs that need to be true for a solution to succeed. Click + Add Assumption on any solution to capture them. Each assumption can be linked to an Experiment for testing.
Examples of good assumptions:
- "Users will check their trial status at least once a week"
- "An email reminder 7 days before expiry will reduce churn by 15%"
- "Users prefer in-app notifications to email for billing alerts"
Evidence
Every opportunity, solution, and assumption can carry linked Evidence — the concrete signals that back up why you believe it. This is what makes a claim on the tree traceable back to its source instead of just an opinion.
Each piece of evidence has:
- Source type — Interview, Feedback, Support Ticket, Experiment Result, or Analytics
- Excerpt — The actual quote, ticket text, or data point
- Confidence — High, Medium, or Low, reflecting how strongly this signal supports the claim
- Source URL (optional) — A link back to the original interview recording, ticket, or dashboard
Adding evidence
Click + Add Evidence from any opportunity, solution, or assumption to attach a new signal. Evidence attaches to exactly one node — if it's more broadly relevant, you can re-parent it later.
Where evidence shows up
- Rollup badges — Opportunity cards show a "Backed by N signals from M sources" badge; solution cards show "Backed by N signals." These count only evidence attached directly to that opportunity or solution — evidence attached to a solution or assumption doesn't roll up into its parent opportunity's badge.
- Evidence list — Opportunity, solution, and assumption detail views show the full list of evidence attached directly to that node, each tagged with its source type and confidence.
Because evidence doesn't roll up the tree, attach it to the specific node it actually supports — evidence for a particular solution belongs on that solution, not on the parent opportunity.
Linking an opportunity to Objectives, and the workspace tree
Discovery connects to your OKRs through links:
- Opportunity ↔ Objective. An opportunity can be linked to as many Objectives as you chose to pursue it for. Its Driving Key Result (above) also links it to that Key Result's Objective, so older data is not left unlinked.
- Solution ↔ Key Result. A solution can be linked to the Key Results it is meant to move, in addition to its one parent opportunity. On Opportunity-first and Torres workspaces you make them yourself: open the solution and use its Linked Key Results box (Linked Success metrics under Torres) to tick or untick any Key Result in the workspace, each tick saving immediately. The Key Result's panel lists its Linked Solutions. Agents make the same links with the link tools in the MCP API. The workspace tree below and the Canvas show them.
Workspaces that use the Opportunity-first OKRs or Torres thinking model (a workspace admin picks it in Settings) get two extra things in Discovery:
- On an opportunity, a multi-select box (titled Objectives, or Outcomes under Torres) to link the opportunity to every Objective you chose to pursue it for. Once the workspace has at least one Objective, select Change (or Link objectives when there are none), then tick or untick; each tick saves immediately. If an Objective is linked only because of the opportunity's Driving Key Result, unticking it explains that and changes nothing: change the Key Result instead.
- A tree button in the Discovery header (Objective tree / Outcome tree) that opens the workspace tree at
/discovery/tree: Objectives, their linked opportunities and the solutions under them, with opportunities that are not linked to any Objective gathered in a pool. Solutions are shown against the Key Results they are linked to.
Classic workspaces see neither: there is no box and /discovery/tree is not found. The board, the Tree view and the Solutions list work the same under every model. Details are on the Thinking models page.
The OST Tree View
Switch from board view to Tree view using the toggle at the top right of the Discovery page. The Tree view renders your full Opportunity Solution Tree:
- Your active OKR outcome at the root
- Opportunities branching from the outcome
- Solutions hanging off each opportunity
- Assumptions attached to each solution
- Experiments already testing each assumption
This view is most useful in team discussions and stakeholder reviews, where you need to show the full reasoning chain from outcome to experimental evidence.
Any assumption with no linked experiment yet shows a Test this assumption → link. Clicking it opens the Experiments page with the new experiment composer open and pre-filled to test that assumption, closing the loop without leaving the tree to hunt down the right assumption manually.